8-10. STEREOVISION
One of the limitations of the vertical aerial photograph is the lack of apparent relief. Stereoscopic vision (or as it is more commonly known, stereovision or depth perception) is the ability to see three-dimensionally or to see length, width, and depth (distance) at the same time. This requires two views of a single object from two slightly different positions. Most people have the ability to see three-dimensionally. Whenever an object is viewed, it is seen twice--once with the left eye and once with the right eye. The fusion or blending together of these two images in the brain permits the judgment of depth or distance.
a. In taking aerial photographs, it is rare for only a single picture to be taken. Generally, the aircraft flies over the area to be photographed taking a series of pictures, each of which overlaps the photograph preceding it and the photograph following it so that an unbroken coverage of the area is obtained (Figure 8-20). The amount of overlap is usually 56 percent, which means that 56 percent of the ground detail appearing on one photo also appears on the next photograph. When a single flight does not give the necessary coverage of an area, additional flights must be made. These additional flights are parallel to the first and must have an overlap between them. This overlap between flights is known as side lap and usually is between 15 and 20 percent (Figure 8-21).
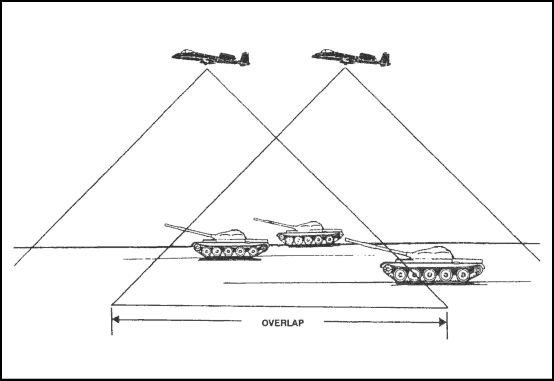
Figure 8-20. Photographic overlap.
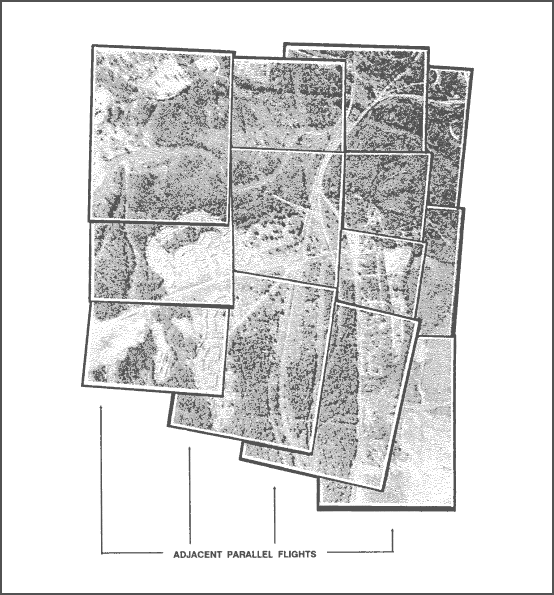
Figure 8-21. Side lap.
b. The requirement for stereovision can be satisfied by overlapping photographs if one eye sees the object on one photograph and the other eye sees the same object on another photograph. While this can be done after practice with the eyes alone, it is much easier if an optical aid is used. These optical aids are known as stereoscopes. There are many types of stereoscopes, but only the two most commonly used are discussed in this manual.
(1) Pocket Stereoscope. The pocket stereoscope (Figure 8-22), sometimes known as a lens stereoscope, consists of two magnifying lenses mounted in a metal frame. Because of its simplicity and ease of carrying, it is the type used most frequently by military personnel.
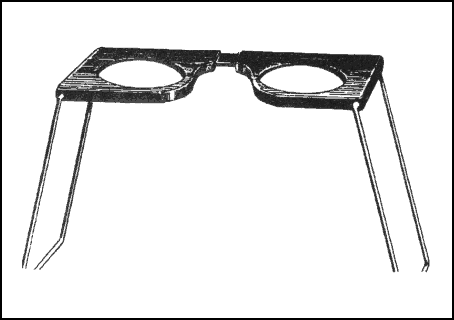
Figure 8-22. Pocket stereoscope.
(2) Mirror Stereoscope. The mirror stereoscope (Figure 8-23) is larger, heavier, and more subject to damage than the pocket stereoscope. It consists of four mirrors mounted in a metal frame.
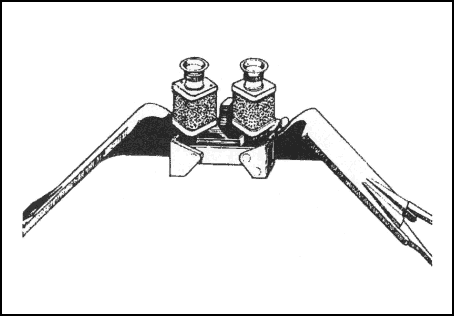
Figure 8-23. Mirror stereoscope.
c. A method to orient a pair of aerial photographs for best three-dimensional viewing is outlined below:
(1) Arrange the selected pair of photos in such a way that the shadows on them generally appear to fall toward the viewer. It is also desirable that the light source enters the side away from the observer during the study of the photographs (Figure 8-24).
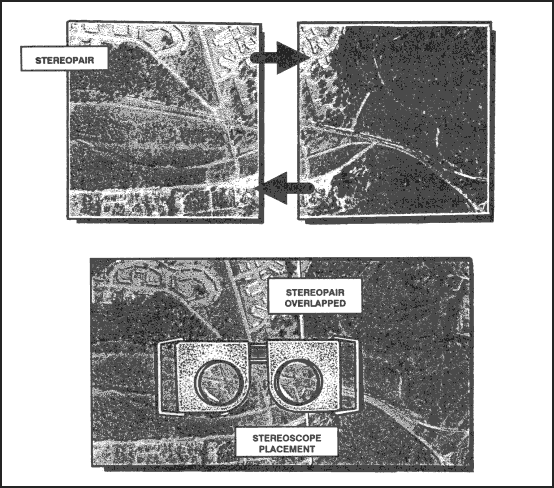
Figure 8-24. Placement of stereoscope over stereopair.
(2) Place the pair of photographs on a flat surface so that the detail on one photograph is directly over the same detail on the other photograph (Figure 8-24).
(3) Place the stereoscope over the photographs so that the left lens is over the left photograph and the right lens is over the right photograph (Figure 8-24).
(4) Separate the photographs along the line of flight until a piece of detail appearing in the overlap area of the left photograph is directly under the left lens and the same piece of detail on the right photo is directly under the right lens.
(5) With the photograph and stereoscope in this position, a three-dimensional image should be seen. A few minor adjustments may be necessary, such as adjusting the aerial photographs of the stereoscope to obtain the correct position for your eyes. The hills appear to rise and the valleys sink so that there is the impression of being in an aircraft looking down at the ground.
(6) The identification of features on photographs is much easier and more accurate with this three-dimensional view. The same five factors of recognition (size, shape, shadow, tone, and surrounding objects) must still be applied; but now, with the addition of relief, a more natural view is seen.
|